Tags for mums

Standard

Hello lovely crafters

Did you miss me lol

The time seems to have flown by this year, after making the card on my last post I took a little break. I have been doing an NVQ at work but have finally finished my theory. I have been taking spanish lessons for almost a year now, (love the language) so that has taken up a fair amount of time.

I’ve also been feeling really tired and then seemed to have lost my mojo, like you do sometimes. Also been told I am borderline type two diabetic, so maybe that’s why I feel tired, I don’t know.

So to get my mojo back I have been going to some workshops run by some very lovely ladies Eileen Godwin and Sally Newick. I will share some of the makes with you soon. I’ve started scrap booking, only made a few pages but this is new for me. I will be making the invitations for my daughter’s wedding, so I have bought a laser printer and a hot foil machine, yet to have a proper play with that, will let you know how it goes!

Back in March however I did manage to make some tags for mother’s day, using grey board, 6×6 papers or scrap bits, ribbons and embellishments.

Thanks for stopping by

Happy crafting

xx


Delightful Daisy Anniversary Card

Standard

Hello visitors

I would like to share this Anniversary card with you today, It’s for my Mum and Dad to take out to Australia for their friend’s anniversary later this year.

img_2355

I hope they all like it as I didn’t know what colours they would like so I tried to keep it fairly neutral.

I mat and layered my 6×6 card and made 2 more 4×4 then centred one piece to the main card and off set the other.

Then I stamped the set of rings and made a mask so that I could stamp the glasses on top making it look like the rings were around the stems of the glasses. Using pro markers I lightly coloured the image and then covered the glasses in glossy accents.

I painted the wedding rings with Imagination crafts starlight gold metallic paint and finished off with distress ink to the edges.

I made two sets of Heartfelt creations delightful Daisy stamp and dies, and coloured these with Scattered Straw and Spiced Marmalade distress inks, and peeled paint on the leaves.

I shaped the flowers with a ball tool, glued them together and painted over them with a varnish

To finish off I added some gems and a Happy Anniversary sentiment.

Thanks for popping in

xx

up cycled envelope

Standard

Hi

Amazon delivered a package a few weeks ago, in this cardboard envelope, I liked the shape and in my mind saw a whole new look, so I kept it and up cycled it last night.

amazon-envelope

I chose 4 sheets of 12 x 12 papers 2 of each.

img_2321Then carefully opened up the glued edges.

opened-envelopeI cut strips of the rose paper to fit around the edges, then went over it with the black ‘bitten’ rose paper.

I had to do this because the paper wasn’t big enough, but I thought it turned out ok.

recycled-envelope

Once it was all covered inside and out, I added stripes of gems to frame the centre paper on both sides.


upcycled-envelope-front1

Using a cropodile, I punched some holes and added metal eyes.

Then threaded some red ribbon through and tied the bow to finish off.

Happy up cycling

xx


Card for Mathew

Standard

Hi

I was asked by a lovely Lady (Tai ) to make her son Mathew an 18th Birthday Card.

A few Ideas came to mind and so the card turned into more of a six page keepsake.

Happy 18th Birthday to Mathew.

I hope you liked it, and here is how I made it.

18th-card
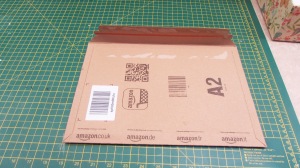
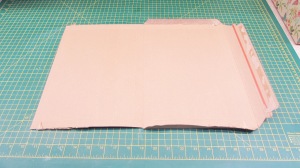
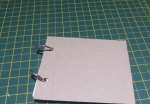
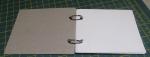
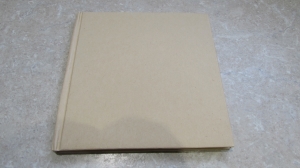
I made two 6×6 cards from Kraft card and joined them together so I had six pages to work with.

I have used distress inks on all of the edges and papers to give a worn look.

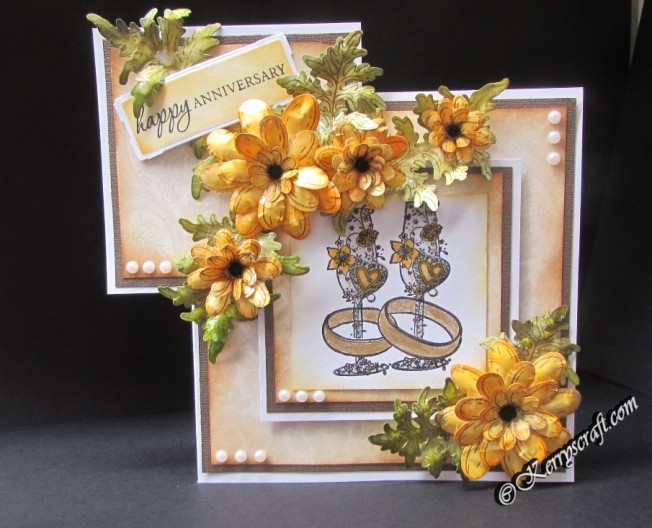
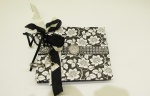
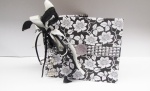
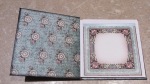
I covered the front with Heartfelt Creations cogs and gears paper, heat embossed some cogs in gold and added the golden key, then from Grey board I cut the cogs from Tim Holtz Gadget Gears #2 dies, and made them gold using gilding wax, and did the same for the number and words.

I attached the bead to some raffia to use a fastening.

travel-card
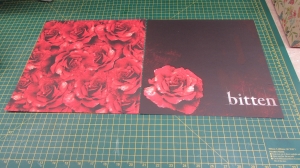
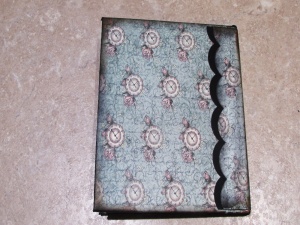
For the inside I chose some vintage papers and added the tag to the first page, spelling Mathew and adding scattered type keys.

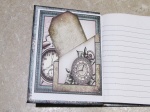
The next two pages I managed to find some paper that had travel related images, I added sentiments to the passport page.

For the centre page I made a lift up panel, on the outside I used glossy accents on the glasses and added the camera and sentiment.

mens-card
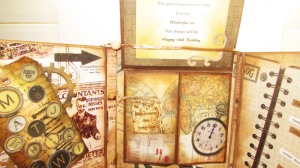
Inside I made two panels, one with a pocket for the removable tag saying:

‘look in here for yester-year’

And then used glossy accents again on the watch face.

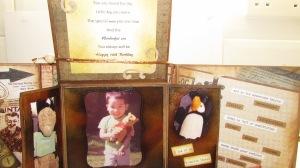
For the upper side I added a verse ( I had to wrap the fastening around it just to keep it up for the photo)

memoriesInside this I added some personal details, Mathew as a toddler and two of his favorite toys.

memories-1

Using Kraft card I cut the frames from Spellbinders labels eight, distressed it with inks then heat embossed it with clear embossing powder.

For this page I heat embossed Mathews birthday date and month the used distress inks over the top.

clock-page

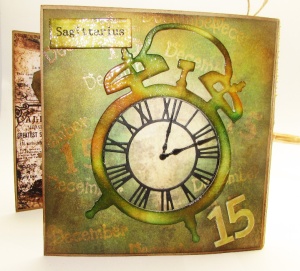
I used a Tim Holtz clock die ‘tick tock’ coloured it with distress inks and heat embossed this with clear embossing powder. I cut the numbers from black card and set the clock hands to the time Mathew was born.

I added the star sign and the number 15 to finish off.

And then lastly for the back page I added a lovely family photo

family-page

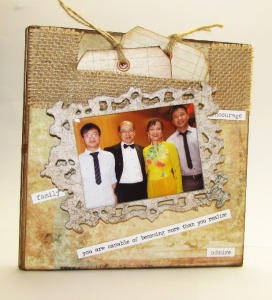
using paper for the bottom half and hessian for the top I made a pocket for two blank removable tags.

I covered the tags ( Sizziz tags #5) with lines paper and left blank for mum and dad to write their own personal messages

Then the frame was cut using Tim Holtz Ornante frame die and some Tim Holtz sentiments to finish off

I really enjoyed making this card and feel very honored to have made it.

Thanks for looking in today

xx


Vintage mdf box

Standard

Hi

Today I finally got around to covering this little MDF box, It’s been sitting in my stash for a while, and I fancied a quick little project today.

It’s handy for make up brushes or pens.

I chose a sheet of paper from the Mademoiselle stack, covered the box inside and out.

Then using distress inks in vintage photo and rusty hinge, I inked the edges and just over the embossed paper to make it stand out better.

img_2309

I added ‘ live, laugh & love’ to the sides, along with a butterfly, hearts and a card stand with I used for a corner.

live-laugh-love-mdf-box mdf-box-laugh mdf-vintage-covered-box I added some gems to finish off and sprayed it with a sealer

img_2310Thanks for looking today

xx

Les Fleur’s Bottle

Standard

Hi

This weeks make is a wine bottle, I’ve not made one for a while and have been waiting to use this lovely napkin.

I started by covering the bottle with gesso.

Then using a damp brush I drew a water line around the parts of the napkin that I wanted to use, then separated the layers as I only needed the top one.

I glued these in place with some mod podge.

decorated-wine-bottle

I used white chalk paint and covered the rest of the bottle, then using a sponge I daubed grey chalk painted over the white and up to the napkin.

I added some garden string to the top and a couple of wooden embellishments.

les-fleurs-napkin-wine-bottle

I also added a few gems to the flowers.

delicate-aster-wine-bottle

Then my all time favourite flowers, the delicate aster from Heartfelt Creations.

using white paper and distress inks in Festive Berries and Fired Brick  I shaped the petals and glued together along with some leaves and a little glitter.

napkin-covered-wine-bottle

Hope you like it

thanks for looking

xx

Shans 25th Birthday Card

Standard

Hello visitors

Its been a while again! haha.

I’ve been so busy and haven’t blogged in over month so I have some catching up to do.

I wanted to share this card with you, I made it for my daughter Shannon, for her 25th birthday.

sheena-douglass-embossing-folder

I used an 8 x 8 scalloped card and layered it with a 7.5 x 7.5 pink card, which I distressed with seedless preserve and ripe persimmon distress inks.

I took a piece of white card and ran it through a Sheena Douglass dry stone wall embossing folder and cut the shape with spellbinders grand scalloped squares. Then coloured it with distress inks in the same colours as above and added some picked raspberry.

I cut a rectangle from the brickwork card and put some silver mirror card behind it, then glue all this in place.

I used some paper that has script printed on it and distressed the edges with a Tim Holtz paper distresser. I used inks in Spiced Marmalade, Black Soot, Vintage Photo and Seedless Preserve.

Using the doll stamp ‘Megan’ from the Julie Nutting collection ( I love this and need to buy another ) ! I stamped the image onto a piece of white card, then again onto some patterned paper. I cut out the skirt twice and layered it, and the top once making sure the little frill covered the skirt waistband then the boots and hair band.

I have given the link below from Prima Marketing, I found it really helpful.

Once all glued together, I used copics to colour the skin, pro-makers on the hair and water pencils to highlight the clothing and boots.

The leaves are from Heartfelt creations and coloured with peeled paint and scattered straw distress ink, the flowers are a mixture from my stash. (including a little bit from my wedding bouquet from 25 years ago lol)

I glued these in place with some silicon glue as it gives time to move things around.

I added a metal embellishment handbag, ribbon, some wooden butterflies a die cut ‘Happy Birthday’ and Daughter.

I hope you like it, my daughter loved it

thanks for popping in today

Happy Crafting x


note book cover

Standard

Hello visitors

I was having a tidy up in the craft room and got a bit distracted, I found another note-book that needed covering so instead of putting it away I started another little project but made the effort to do it from start to finish tonight, I have too many unfinished projects at the moment lol.

This is a small note-book with ring binders

img_2268

img_2269

I removed the rings and covered the gray board with some black and white patterned paper

covered-note-book

on the inside I covered it with black card

inside-note-book

I added some ribbon and bling to the centre

decoreated-note-book

and finished off with some ribbon, beads and a little handbag charm

decorated-front-cover

thanks for looking today

happy crafting

xx

Time is short, book cover

Standard

Hi.

Today I would like to share with you a little note-book that I have covered using Heartfelt Creations paper pad ‘ Once upon a time’

I started off with a 5 1/2″  sq lined note-book

img_2245

Using Heartfelt Creations paper pad Once upon a Time I measured and cut my selected page an inch bigger all the way around.

I snipped off the corners so it would fold in and made some cuts at the spine, then glued the paper in place.

This is the back, I also covered the spine with another piece of paper and cut the shape from a spellbinder boarder die, and then bent this around the front.

book-cover-back

I used a clock die ( one of my Hobbylobby purchases ) and black card, I cut a sentiment from the paper pad and used silicone glue to raise it up a little.

I also inked the book edges with distress inks in Black soot and Vintage photo.

heartfelt-creations-book-cover-time

Using Creative expressions cast bronze metallic gilding wax,

I rubbed this over the black card border and clock, and also over the little metal Finnabair corner.

I made a small pocket on this page

once-upon-a-time-collection-book-cover

And

And I covered the inside and made a small pouch with a tag insert

heartfelt-creations-once-upon-a-time-collection

Hope you like it

Thanks for your visit today

xx

Decoupage pine drawers

Standard

Hello visitors

It’s been ages since my last post and don’t know where the time went, during the summer I did visit America, I stayed in Atlanta and had a  shopping morning at Hobbylobby and managed to get a few ideas from there for some new projects, any walking dead fans? I went on the walking dead tour which was brilliant and recommend it.

So, while I was away hubby was decorating the spare room in some lovely pink paris wallpaper, I had this chest of drawers given to me by my late uncle and wanted to give it a face lift.

pine-unit


I gave it a light sanding and painted it white, I then roughly cut some left over wallpaper to fit the top and drawer fronts of the unit. I then soaked the backing off the wallpaper and let it dry out. Using Mod Podge I glue the wallpaper in place taking care to smooth out, when it was dry I gave it another coat of glue, then after that dried I varnished it with decoupage varnish.

Some pictures of my efforts

decoupage-unit

decoupage-pine-unit-paris

decoupage-paris-wallpaper

I was quite pleased with my first attempt at this,

and it’s brightened up my spare room too.

Thanks for looking today

xxx